
USING VOODOO GRAPHIX EXTREME FILES
Preparing
Your File for Use
To prepare a file for production, start by opening both the image file
and its matching vector cutpath (See Figure 1). The vector has a 10% gray
fill which should be considered temporary and changed to the requirements
of your program and the job you are planning. Since this varies from one
program to the next, the exact change you make must be determined by you.
For example, if you are setting up the job in FlexiSign, you might be
applying a “Contour Cut” to the vector. In Omega, it might
be simply turning off the gray fill. In other applications, you may have
a designated stroke that causes your software to recognize the vector
as a cutpath. Or you may simply want to make the vector into a clipping
mask in Illustrator or a powerclip in CorelDraw.
The image files in Voodoo Graphix Extreme have an extra amount of black
around all edge surfaces that gets cut away in a print and cut situation.
When an image is only being printed then the vector cutpath can be used
to create a clipping mask which reduces the thickness of the black edges
and makes them smoother for print. If you compare the image in Figure
1 with the image in Figure 4, the benefit of a clipping path should be
evident.
Determine whether or not the vector is to be on top or on the bottom in
relation to the image. In the below example, we made a clipping path in
Adobe Illustrator so the vector should be on top. In other situations
it may need to be on the bottom. The principles remain the same if you
are setting the image up for some other requirement. Select both objects
(See Figure 2). Justify (align) both objects on their center axes (See
Figure 3). Apply any other effect required by your job situation (See
Figure 4). Finally, Select All and Group as one object. The file may now
be brought into your layout and is ready for production.
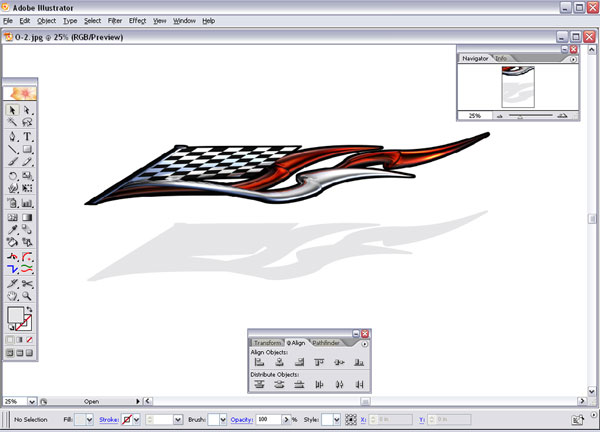
Figure 1 -
Opening both the image and the vector file into your workspace.
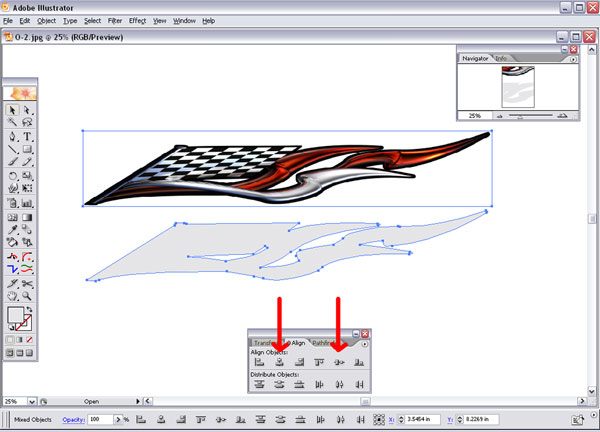
Figure 2 -
Set layer order for desired result, select both image and vector and center
justify on both axes.
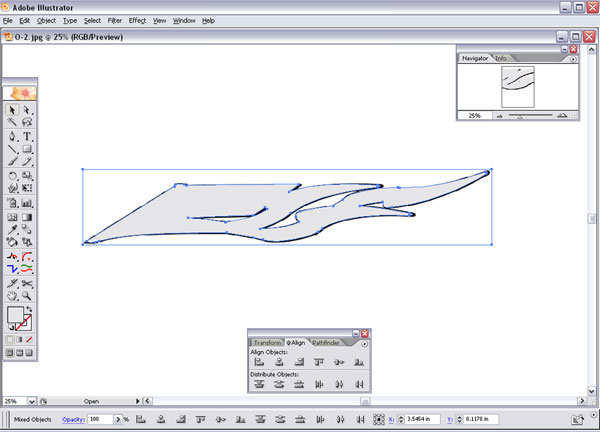
Figure 3 -
Justifying the two objects results in near perfect alignment.
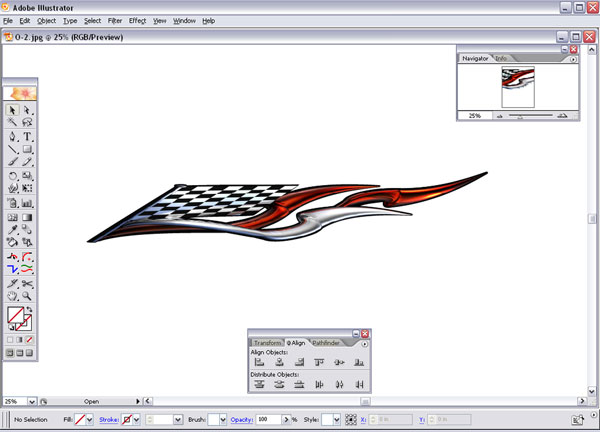
Figure 4 -
Finished file as image and clipping path.
Home / Voodoo Graphix Info / Store / Contact Us / Links / Clipart Gallery